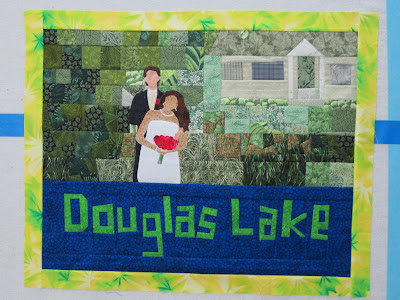
Progress # 1
The wedding quilt top is coming along. I've made three more "blocks" since my last post. Five more to go and I should be able to start cobbling this baby together. As I begin to see the end of the project, I have to remind myself that no matter what... it will take time. The last laps seem to take the longest; I've never run track, but I imagine that it sometimes feels that way.
 |
| (Teotihuacan- Pyramid of the Sun) |
 |
| mosaics - note the diamond |
Progress #2
The triangles galore quilt now numbers 21 bocks. I'm shooting for 35! I'm gonna run out of room on the design wall.
Parts
Quilt "parts" are one of the ideas that Gwen Marston and Freddy Moran have advocated in their books,
Collaborative Quilting and
Freddy and Gwen Collaborate Again. They found that making basic pieces such as HST's or nine patches, or piano keys, or spikes, in advance of their meetings made the designing process a lot more efficient. Each of them put together a stash of parts using their scraps and with no set quilt pattern in mind.
I've been making parts, too. I have no set plans for them, but I know I'll use them somehow, someday. I always sew together HST's of the cut off triangles from the corners of flying geese or snowballs (even if they are tiny). I sew together elongated triangles left over from the Triangle Galore project which will make skinny spikes or divided rectangles. I sew these pieces together in the Leader and Ender style of Bonnie Hunter... I have a stash of pieces by my sewing machine. As I start a series of sewing, I will begin the process with one set of the parts and then when I come to the end of the project, I'll sew another together. These leaders and enders take the place of the bit of scrap that is often used at the start of a seam so that fabric and thread don't make an annoying birds nest or jam into the "hole" in the machine. (Sometimes I forget which project I am really working on and end up sewing several parts in a row before I remember they are supposed to be the leader and ender. LOL) Here's just a wee handful of my parts. Those HST's measure 1.75 inches square.

Play
The Bloggers BOM for this month was designed by Amy of
Mrs. Schmenkman Quilts.
These are my four blocks.
The New'Bee made-fabric bee over on
15minutes play.com... Beebee asked for this star of made fabric and a bright solid around it. The solid fabric is really a lot brighter than it appears here. My made fabric was made from tiny scraps, so there is lots of variety.
Parcel
Look what arrived in the mail all of 40 minutes ago! Gwen's newest book! Published by AQS.
It is FABULOUS. No matter what your quilting style is - modern, traditional, scrappy, applique, wonky, liberated, amish solids- there is something of interest in this book. It holds lots of fun and inspiration and how-to hints! Gwen shares the spotlight with a number of BIQR students. I highly recommend this book. I'm looking forward to taking a really good look at all the quilts. I'm going to Gwen's retreat in October and Liberated Medallions is the focus. So excited!


